July 24, 2017
Here is the final two corners of the track with the completed model!

In this project, we design, train, and test a convolutional neural network (CNN) to clone the driving behavior from sample images recorded from Udacity's driving simulator. The code for this project can be found at this repository.
The goals / steps of this project are the following: Use the simulator to collect data of good driving behavior Build, a convolution neural network (using Keras) that predicts steering angles from images Train and validate the model with a training and validation set Test that the model successfully drives around the track without leaving the road
The CNN that was eventually used was based on NVIDIA's End to End Learning for Self-Driving Cars paper with different input image size and with dropout added to improve robustness. Most of the training was done using an Amazon g2.2xlarge EC2 instance, which helped make training much quicker.
Data Gathering
One of the most time consuming aspects of this project was collecting the adequate data to train on. While Udacity provided a dataset from the training simulator, it was more exciting to collect my own training data. Below is a sample of the simulator screen. When collecting data, we use the "Training Mode." There are also two tracks available for training and testing. I focused on using the first track. The second image shows the view that the user sees in the driving simulator.
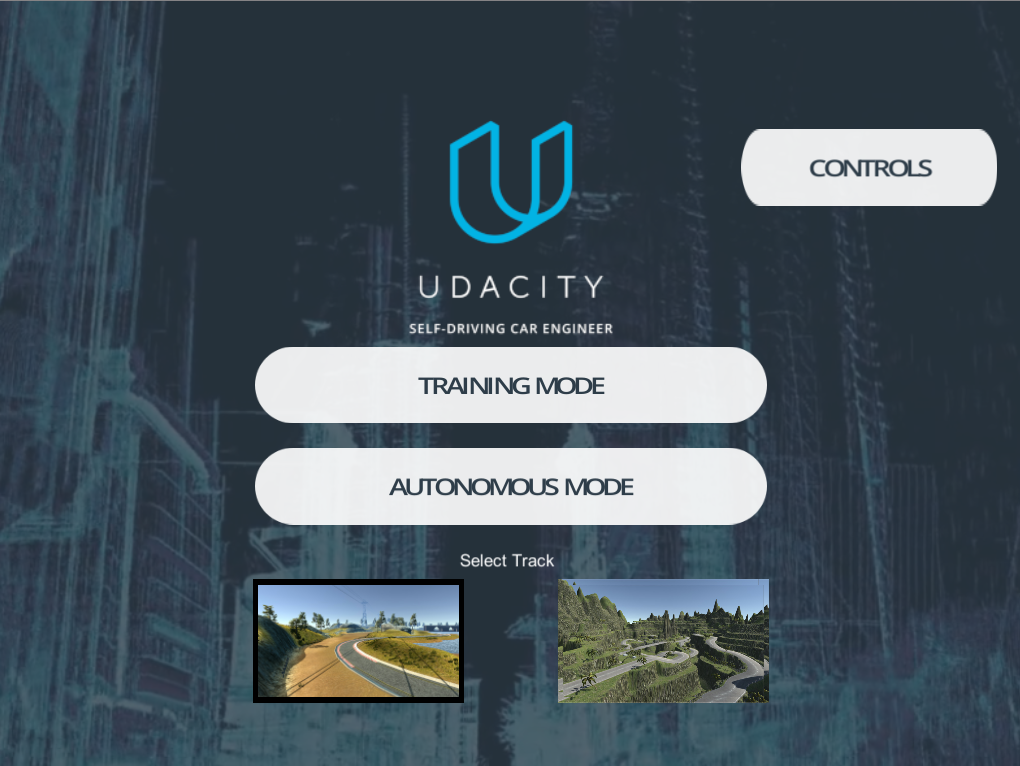
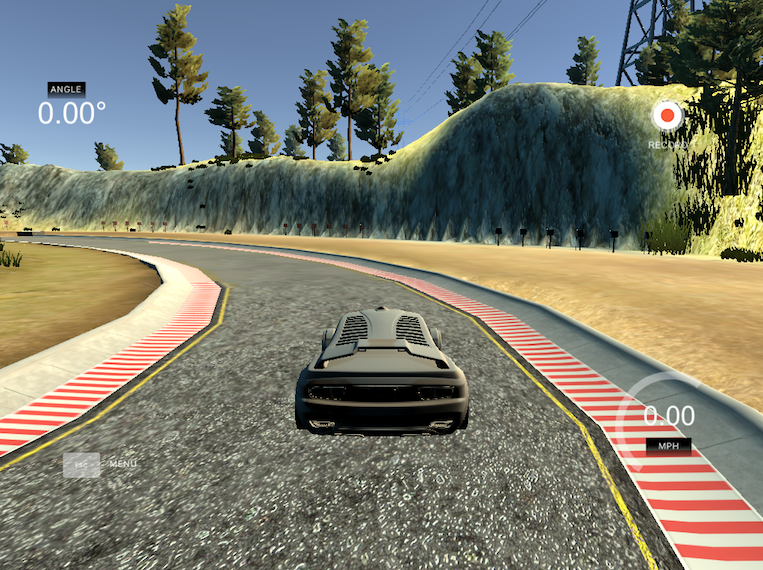
By using the simulator that was provided, it was easy to record laps that would be stored as separate frames. However, the data gathering process had to include a lot of "recovery driving" and driving around corners to make sure that the model could learn the correct behaviors. After recording the different simulator runs, the output are individual frames.
Data Preparation
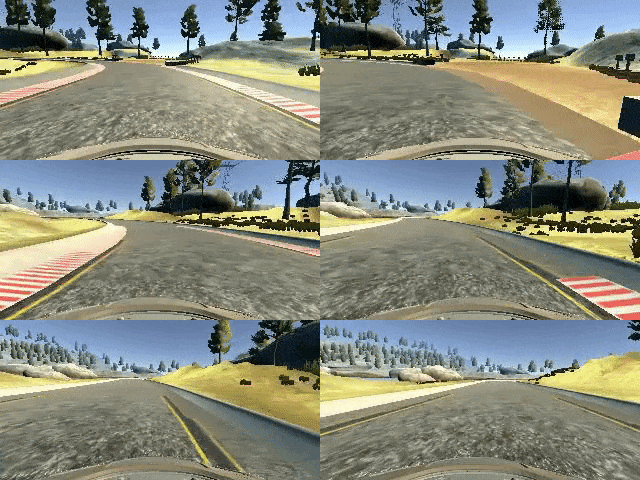
The final dataset before augmentation consisted of 7986 training observations and 1997 validation observations. However, the simulator actually not only recorded the center image, but also the left and right viewpoints. As seen below, the 3 camera angles comprise of each frame of the video. Therefore, the data quantitfy can actually be increased by making use of the left and right images. In particular, when using the left and right camera angles, I had to correct the steering angle so that the data could represent what the steering angle would have been if the viewpoint was from the left or right camera angles.
The data took some fiddling to figure out what worked eventual specifications. For example, when intially training the model, the images were not cropped (160x320x3 images), which meant that for every image there was a large percentage of the image that contained useless information for informing the steering angle.
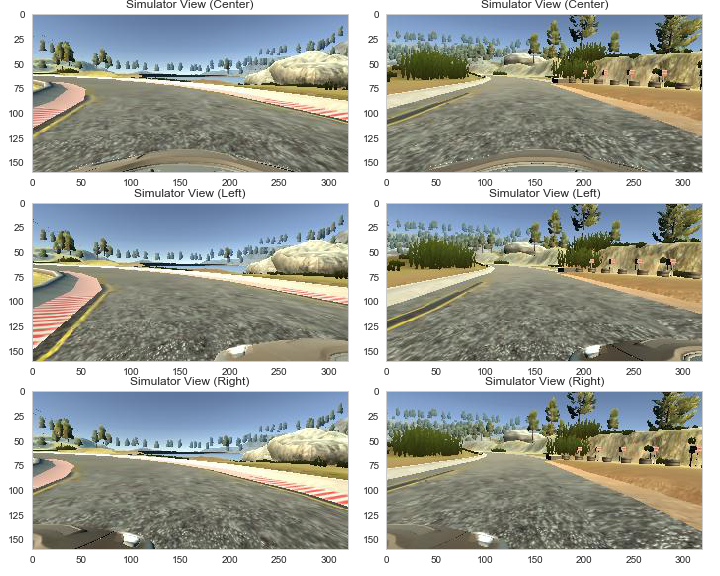
In the above example, we can see that the top portion of every image and even the bottom portion of the image contained extraneous information. After cropping, the performance of the model was improved.
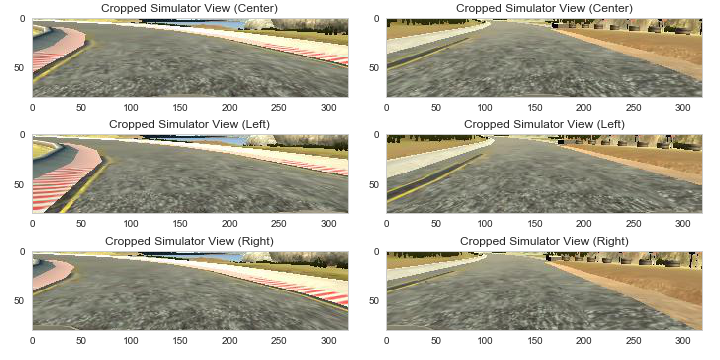
Futhermore, the NVIDIA paper used the YUV channel in their implementation and I similarly chose to use the YUV channel after experimenting between RGB, BGR, and the YUV channels.
Data Exploration and Augmentation
In order to get the network to perform well, I first ran roughly 2 laps around the track (one in each direction). However, the model automated driving was quite horrible on the curved portions of the road. The car would drive off the road fairly frequently.
I took a closer look at the data distribution after reading that this might be a potential issue (the model doesn't know how to deal with corners).
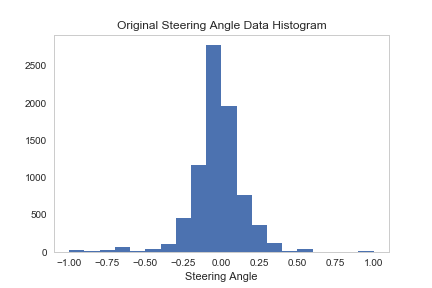
As seen in the image above, the distribution of the data is heavily skewed towards the very low steering angles, which makes sense because most of the driving was on relatively straight roads vs. curved roads. In order to try to create a more even distribution, I collected roughly half a lap (total frames) of curved road driving and also about a quarter of a lap of recovery driving. The recovery driving entailed hitting the record button when I intentionally approached a corner and did not turn in time, then turning heavily to "correct" the behavior.
However, in addition to manually trying to augment data I also forced the distribution to be more uniform by downsampling the over represented steering angles and upsampling the underrepresented ones. I created a histogram and randomly chose up to observations that fell into a particular bucket to get the total number of observations up to 500.
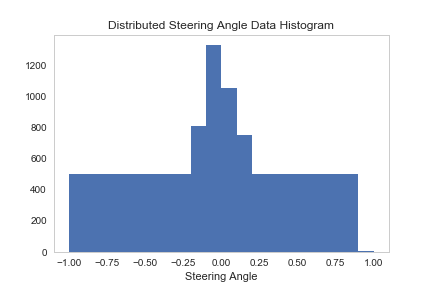
The resulting data distribution was much more uniform and resulted in the car being able to correct for even severe mistakes (such as driving too far to one side of the track and hitting the apex). The below gif shows the model trained using the augmented data. We can see that even though the vehicle gets close to the apex/side of the road, it is able to navigate back to the center of the track.
Building the Model
After getting the data ready, I focused on replicating the NVIDIA model architecture because it had worked well in the real life setting and therefore I figured it would be useful in the simulated world as well.
Specifically, the network is 9 layers deep with exponential activation units and dropout after the convolutional layers. As mentioned previously, the training took place on a Amazon EC2 instance and I use 5 epochs to train on 80% of the total data with 20% left for validation. The network was built with Keras and used Tensorflow as the backend. One of the awesome things about Keras is that it keeps the model building relatively simple so the model was written with only a couple lines of code.
While the network worked, after reading other student's efforts it seems like even simpler networks could work quite well.
| Layer | Description |
|---|---|
| Input | 80x320x3 YUV Image |
| Normalization | Normalize batch |
| Convolution 5x5 | 2x2 stride, valid padding, outputs 38x158x24 |
| ELU activation | |
| Convolution 5x5 | 2x2 stride, valid padding, outputs 17x77x36 |
| ELU activation | |
| Convolution 5x5 | 2x2 stride, valid padding, outputs 7x37x48 |
| ELU activation | |
| Convolution 3x3 | 1x1 stride, valid padding, outputs 5x35x64 |
| ELU activation | |
| Convolution 3x3 | 1x1 stride, valid padding, outputs 3x33x64 |
| ELU activation | |
| Dropout | 0.5 keep probablility (training) |
| Flatten | |
| Fully connected | 3168 input, 100 output |
| Fully connected | 100 input, 50 output |
| Fully connected | 50 input, 10 output |
| Output | 10 input, 1 output |
In order to feed data to the network, I used a generator function so that the data did not have to all be stored in memory. Only when the data was needed would it be read into memory and sent over as a batch.
Discussion and Next Steps
Overall, this project was really interesting and it was surprising that a couple lines of code could create a model that was able to emulate driving behavior. While the results are acceptable, there are definitely a couple improvements that come to mind.
- First of all, the data gather process could have been more thorough and also could have used different samples. In this case, I trained the model on images from the same track that it eventually ran on. It would interesting to tune the model and make it robust enough to work on any track that it is set on.
- In terms of data preprocessing, only very simple data preprocessing steps were taken. It might be beneficial to combine some of the steps that were implemented in the other projects to help, for example, highlight the lane lines more clearly so that the model can use less noisy input data.
- In reality, a vehicle would not be running in isolation and instead would be in an environment where there are many other distractions and unexpected objects that might suddenly appear. This is where radar and sensor data could be used in combination with the computer vision aspects to help inform a more well rounded model.